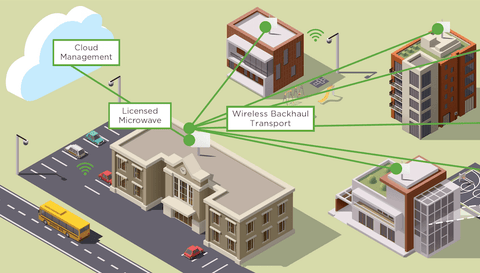
Point to Point Kit for Point to Multi-Point PMP Wireless Network
Jun 08, 2019

How to use P2P Kit for PMP Wireless Network?
Our WiFi Point To Point (P2P) bridge kit has been popular and has an application whereby it can also be used as a Point to Multi-Point (PMP) Wireless Network. While you can use out ePMP bridge for point to multi-point wireless network, however, you will need to configure the driver mode as "TDD" on both sides. See instructions below under "Configuration required on AP and SM". Instructions show the basic configuration required to form a link between the AP and multiple SMs.
Will using it as PMP instead of P2P affect Internet speed?
These radios are capable of providing the throughput of 200 Mbps which actually depends on the channel bandwidth, distance and number of SMs connected to the AP. While ePMP Radios can deliver maximum up to 200 Mbps Internet speeds, please note that the wireless data transmission will be distributed among all the clients connected to the AP. Therefore, throughput on each SM will depend on the link condition, distance etc.
Here's an initial configuration that is required to bring up the link between the ePMP AP and ePMP SM:
Configuration required on AP:
Step 1: Under Quick Start:-
a) Radio Mode should be selected as Access Point.
b) Access Point Mode should be:
b1) TDD: - if use of ePMP is for PMP (Point to Multipoint connection).The AP is able to GPS synchronize in this mode (except when in Flexible mode).
b2) ePTP Master: The Access Point will operate as a Master in point-to-point (P to P) mode. The AP does not support GPS Synchronization in this mode but is able to provide significantly lower latency than other modes.
b3) TDD PTP: The Access Point is operating in point-to-point (PTP) mode using TDD scheduling. The AP is able to GPS synchronize in this mode (except when in Flexible mode).
c) Country: From the drop-down list, select the country in which the radio is operating to conform to local regulatory requirements.
d) Max Range: This value should be selected as per the range of farthest SM.
e) Automatic Channel Selection:-
- If selected as Enable: It will allow the AP to choose the best channel possible under the current RF environment. This feature is not available when the AP is in ePTP Master mode.
- If selected as Disabled – ACS is disabled and the operator should configure a Frequency Carrier manually.
f) Frequency Carrier: Choose one frequency from the drop–down list.
g) Configure SSID and Device Name as per your requirement.
h) Downlink/Uplink Ratio: Configure this as per your requirement since this specifies the percentage of the aggregate throughput for the downlink and uplink frames transmitted from the AP to the SM and vice-versa.
i) Synchronization Source:-
- Select GPS: - if the AP will receive synchronization pulses from a connected GPS antenna.
- Select CMM3 or CMM4:- if the device will receive GPS synchronization pulses from a co-located Cambium Cluster Management Module.
- Select Internal: - if no GPS synchronization source is available.
Note: - If Flexible is chosen as the DL/UL Ratio or if the Access Point Mode is chosen as ePTP Master, then this parameter will be greyed out.
j) IP Assignment:-
- Select DHCP: - if there is DHCP server in your network to assigns the IP configuration.
- Select Static: - To give IP address, subnet mask and gateway manually.
k) Wireless Security:
- Open: All SMs requesting network entry are allowed registration.
- WPA2: Configure this key on the AP and then configure each of the network SMs with this key to complete the authentication configuration. This key must be between 8 to 128 symbols. Click the visibility icon to toggle the display of the key’s contents.
- Radius: - If using Radius server for authentication.

Here's an initial configuration that is required to bring up the link between the ePMP AP and ePMP SM:
Configuration required on SM:
Step 2: Under Quick Start:-
a) Radio Mode should be selected as Subscriber Module.
b) Subscriber Point Mode should be same as configured in the AP (TDD, ePTP Slave, TDD PTP).
c) Country: SM will follow the AP's country.
d) Device Name: - Configure this as per your requirement.
e) Network Mode :-
- Bridge: The SM acts as a switch and the packets are forwarded or filtered based on their MAC destination address.
- NAT: The SM acts as a router and the packets are forwarded or filtered based on their IP header (source or destination).
f) IP Assignment:-
- Select DHCP: - if there is DHCP server in your network to assigns the IP configuration.
- Select Static: - To give IP address, subnet mask and gateway manually.
Note: Please make sure that IP address of AP and SM should be in the same subnet range if using bridge as a network Mode.
g) Wireless security and Frequency Carrier should be same as configured on AP.

Share this post
2 comments


The best part about this system is that no matter how complicated it looks, you can call up a technician and have them handle everything. That’s one of the advantages of signalbooster.com, there is help for customers at all levels; residential, business, or commercial. Not everyone will need help but if they do, it’s good to know it’s ready.
Anytime I see wireless network, I get worried because you have to be careful about security. Whether it’s a residential set-up or a business set-up, you can’t be lax with your wireless security. Keep up to date on software and hardware to make sure you have no gaps in security. Cyber-thieves are constantly exploiting software which is why it’s updated to close any security gaps. If you don’t update, you’re vulnerable. Also make sure your encryption key is complex. I’ve seen some business and personal passwords and they’re weak.